![]()
HASmartThermostat
Smart Thermostat avec contrôleur PID pour Home Assistant
Crée un thermostat virtuel avec une régulation de température précise et réactive par contrôleur PID.
Principe d’un contrôleur PID.
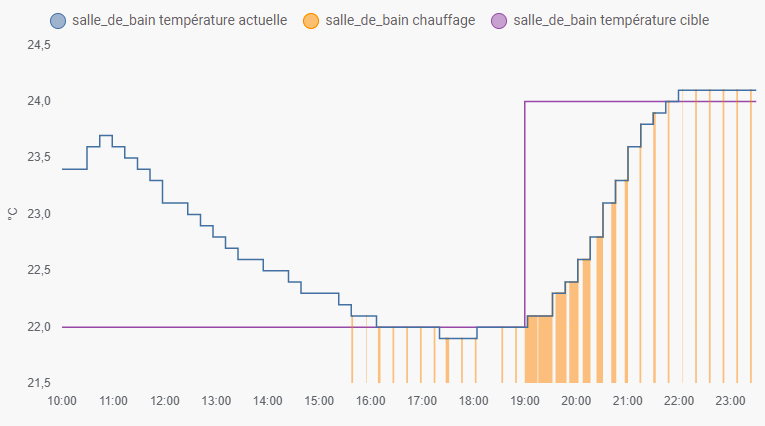
Ce thermostat peut contrôler n’importe quel système de chauffage ou de climatisation via fil pilote ou relais (déconseillé pour les fortes puissances) par modulation PWM en fonction de la température et de sa variation dans le temps.
Installation:
L’installation via Home Assistant Community Store est recommandée.
Installation avec HACS:
Se rendre dans HACS, cliquer sur Intégrations, puis sur le bouton "Ajouter " en bas à droite. Dans le champ de rechercher, entrer « Smart thermostat (PID) » et cliquer sur l’intégration dans la liste en dessous. Cliquer sur « Télécharger avec HACS » pour installer l’intégration.
Installation manuelle:
- Télécharger et extraire le code source : https://github.com/ScratMan/HASmartThermostat/archive/refs/heads/master.zip
- Se rendre dans le dossier de configuration de Home Assistant (par défaut
homeassistant/.homeassistant/; où se trouve le fichierconfiguration.yaml) - Créer un dossier
custom_componentss’il n’existe pas - Copier le contenu du dossier
custom_components/smart_thermostatdu code source dans un dossier<conf-dir>/custom_components/smart_thermostat
Configuration:
Le Smart Thermostat peut être ajouté à Home Assistant une fois installé en ajoutant une section climate au fichier configuration.yaml.
Configuration example:
configuration.yaml
climate:
  - platform: smart_thermostat
    name: Smart Thermostat Example
    unique_id: smart_thermostat_example
    heater: switch.on_off_heater
    target_sensor: sensor.ambient_temperature
    min_temp: 7
    max_temp: 28
    ac_mode: False
    target_temp: 19
    keep_alive:
      seconds: 60
    away_temp: 14
    kp : 5
    ki : 0.01
    kd : 500
    pwm : 00:15:00
Utilisation:
Traduction en cours
The target sensor measures the ambient temperature while the heater switch controls an ON/OFF heating system.
The PID controller computes the amount of time the heater should remain ON over the PWM period to reach the temperature
set point, in example with PWM set to 15 minutes, if output is 100% the heater will be kept on for the next 15 minutes
PWM period. If PID output is 33%, the heater will be switched ON for 5 minutes only.
By default, the PID controller will be called each time the target sensor is updated. When using main powered sensor
with high sampling rate, the sampling_period parameter should be used to slow down the PID controller refresh rate.
By adjusting the Kp, Ki and Kd gains, you can tune the system response to your liking. You can find many tutorials for
guidance on the web. Here are a few useful links:
- PID Control made easy
- Practical PID Process Dynamics with Proportional Pressure Controllers
- PID Tuner
- PID development blog from Brett Beauregard
- PID controller explained
To make it quick and simple:
- Kp gain adjusts the proportional part of the error compensation. Higher values means
stronger reaction to error. Increase the value for faster rise time. - Ki gain adjusts the integral part. Integral compensates the residual error when temperature settles in a cumulative
way. The longer the temperature remains below the set point, the higher the integral compensation will be. If your
system settles below the set point, increase the Ki value. If it overshoots the set point, decrease the Ki value. - Kd gain adjusts the derivative part of the compensation. Derivative compensates the inertia of the system. If the
sensor temperature increases quickly between two samples, the PID will decrease the PWM level accordingly to limit the
overshoot.

PID output value is the weighted sum of the control terms:
error = set_point - current_temperature
di = temperature change between last two samples
dt = time elapsed between last two samples
P = Kp * error
I = last_I + (Ki * error * dt)
D = -(Kd * di) / dt
output = P + I + D
Output is then limited to 0% to 100% range to control the PWM.
Autotune (not always working, not recommended to use):
You can use the autotune feature to find some working PID parameters.
Add the autotune: parameter with the desired tuning rule, and optionally set the noiseband and lookback duration if the
default 2 hours doesn’t match your HVAC system bandwidth.
Restart Home Assistant to start the thermostat in autotune mode and set the desired temperature on the thermostat.
The autotuner will then start analyzing your heating system, measure the sampling rate of the sensor, control the heater
switch and monitor the temperature changes.
Wait for the autotune to finish by checking the autotune_status attribute for success. The Kp, Ki and Kd gains will
then be computed and set according to the selected rule and the thermostat switches to PID.
The Kp, Ki and Kd gains are also computed using the other rules, and all values are shown in the Home Assistant log
like this: « Smart thermostat PID Autotuner output with ziegler-nichols rule: Kp=######, Ki=######, Kd=###### ».
You should then save for reference the gains computed by the autotuner for future testing.
Warning: The thermostat set point can’t be changed once the autotuner has started monitoring the temperature.
The temperature regulation will work as a basic hysteresis thermostat based on set point and noise band. If your
heating system and temperature monitoring is slow, reducing the noise band will reduce the temperature oscillations
around the set point. If the sampling rate of your temperature sensor is too fast (few seconds) or noisy (frequent
temperature changes) increase the noise band for system stability.
Warning: The autotuner result is saved in the entity attributes and restored after Home Assistant is restarted.
However, it is recommended to save the new gains in the YAML configuration file to keep it in case of Home Assistant
database’s is corrupted.
Services
Services can be used in Home Assistant to configure the thermostat.
The following services are available:\
Set PID gains: smart_thermostat.set_pid_gain
Use this service to adjust the PID gains without requiring a restart of Home
Assistant. Values are saved to Home Assistant database and restored after a restart. Please consider saving
the final gain parameters in YAML configuration file when satisfied to keep it safe in case of database corruption.
Optional parameters : kp, ki and kd, as float.
Example:
service: smart_thermostat.set_pid_gain
data:
  kp: 11.8
  ki: 0.00878
target:
  entity_id: climate.salle_de_bain
Set preset modes temperatures: smart_thermostat.set_preset_temp
Use this service to set the temperatures for the preset modes. It can be adjusted
for all preset modes, if a preset mode is not enabled through YAML, it will be enabled. You can use any preset temp
parameter available in smart thermostat settings.
Example:
service: smart_thermostat.set_preset_temp
data:
  away_temp: 14.6
  boost_temp: 22.5
target:
  entity_id: climate.salle_de_bain
Clear the integral part: smart_thermostat.clear_integral
Use this service to reset the integral part of the PID controller to 0. Useful
when tuning the PID gains to quickly test the behavior without waiting the integral to stabilize by itself.
Reload integration: smart_thermostat.reload
Use this service to reload the thermostat from scratch without requiring a restart of Home Assistant.
Parameters:
- name (Optional): Name of the thermostat.
- unique_id (Optional): unique entity_id for the smart thermostat.
-
heater (Required): entity_id for heater switch, must be a toggle device. Becomes air conditioning switch when
ac_mode is set to True. - target_sensor (Required): entity_id for a temperature sensor, target_sensor.state must be temperature.
-
keep_alive (Required): sets update interval for the PWM pulse width. If interval is too big, the PWM granularity
will be reduced, leading to lower accuracy of temperature control, can be float in seconds, or time hh:mm:ss. - kp (Recommended): Set PID parameter, proportional (p) control value (default 100).
- ki (Recommended): Set PID parameter, integral (i) control value (default 0).
- kd (Recommended): Set PID parameter, derivative (d) control value (default 0).
-
pwm (Optional): Set period of the pulse width modulation. If too long, the response time of the thermostat will
be too slow, leading to lower accuracy of temperature control. Can be float in seconds or time hh:mm:ss (default 15mn). -
min_cycle_duration (Optional): Set a minimum amount of time that the switch specified in the heater option must
be in its current state prior to being switched either off or on (useful to protect boilers). Can be float in seconds
or time hh:mm:ss (default 0s). -
min_off_cycle_duration (Optional): When min_cycle_duration is specified, Set a minimum amount of time that the
switch specified in the heater option must remain in OFF state prior to being switched ON. The min_cycle_duration
setting is then used for ON cycle only, allowing different minimum cycle time for ON and OFF. Can be float in seconds
or time hh:mm:ss (default 0s). -
sampling_period (Optional): interval between two computation of the PID. If set to 0, PID computation is called
each time the temperature sensor sends an update. Can be float in seconds or time hh:mm:ss (default 0) -
target_temp_step (Optional): the adjustment step of target temperature (valid are 0.1, 0.5 and 1.0, default 0.5 for Celsius
and 1.0 for Fahrenheit) -
precision (Optional): the displayed temperature precision (valid are 0.1, 0.5 and 1.0, default 0.1 for Celsius
and 1.0 for Fahrenheit) - min_temp (Optional): Set minimum set point available (default: 7).
- max_temp (Optional): Set maximum set point available (default: 35).
-
target_temp (Optional): Set initial target temperature. If not set target temperature will be set to null on
startup. -
ac_mode (Optional): Set the switch specified in the heater option to be treated as a cooling device instead of a
heating device. Should be a boolean (default: false). - away_temp (Optional): Set the temperature used by the « Away » preset. If this is not specified, away_mode feature will not be available.
- eco_temp (Optional): Set the temperature used by the « Eco » preset. If this is not specified, eco feature will not be available.
- boost_temp (Optional): Set the temperature used by the « Boost » preset. If this is not specified, boost feature will not be available.
- comfort_temp (Optional): Set the temperature used by the « Comfort » preset. If this is not specified, comfort feature will not be available.
- home_temp (Optional): Set the temperature used by the « Home » preset. If this is not specified, home feature will not be available.
- sleep_temp (Optional): Set the temperature used by the « Sleep » preset. If this is not specified, sleep feature will not be available.
- activity_temp (Optional): Set the temperature used by the « Activity » preset. If this is not specified, activity feature will not be available.
-
noiseband (Optional): set noiseband for autotune (float): Determines by how much the input value
must overshoot/undershoot the set point before the state changes (default : 0.5). -
lookback (Optional): length of the autotune buffer for the signal analysis to detect peaks, can
be float in seconds, or time hh:mm:ss (default 2 hours). -
autotune (Optional): Set the name of the selected rule for autotune settings (ie « ziegler-nichols »). If it’s not set, autotune is disabled. The following
tuning_rules are available:
| ruler | Kp_divisor, Ki_divisor, Kd_divisor |
|---|---|
| « ziegler-nichols » | 34, 40, 160 |
| « tyreus-luyben » | 44, 9, 126 |
| « ciancone-marlin » | 66, 88, 162 |
| « pessen-integral » | 28, 50, 133 |
| « some-overshoot » | 60, 40, 60 |
| « no-overshoot » | 100, 40, 60 |
| « brewing » | 2.5, 6, 380 |
Sources
Ce code est issue du projet Smart Thermostat PID:
https://github.com/aendle/custom_components
Le module Python PID avec Autotune est basé sur pid-autotune:
https://github.com/hirschmann/pid-autotune